Data Sources
Streaming Data Sources: For real-time streaming data sources such as Kafka and NATS, please refer to the Streams documentation.
Creating New Data Sources
To create a new data source:
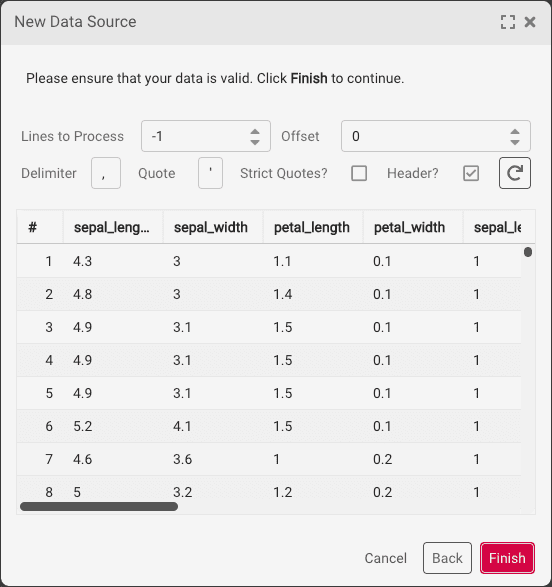
Open the Data Sources accordion and click the Add Data button. A New Data Source wizard appears.
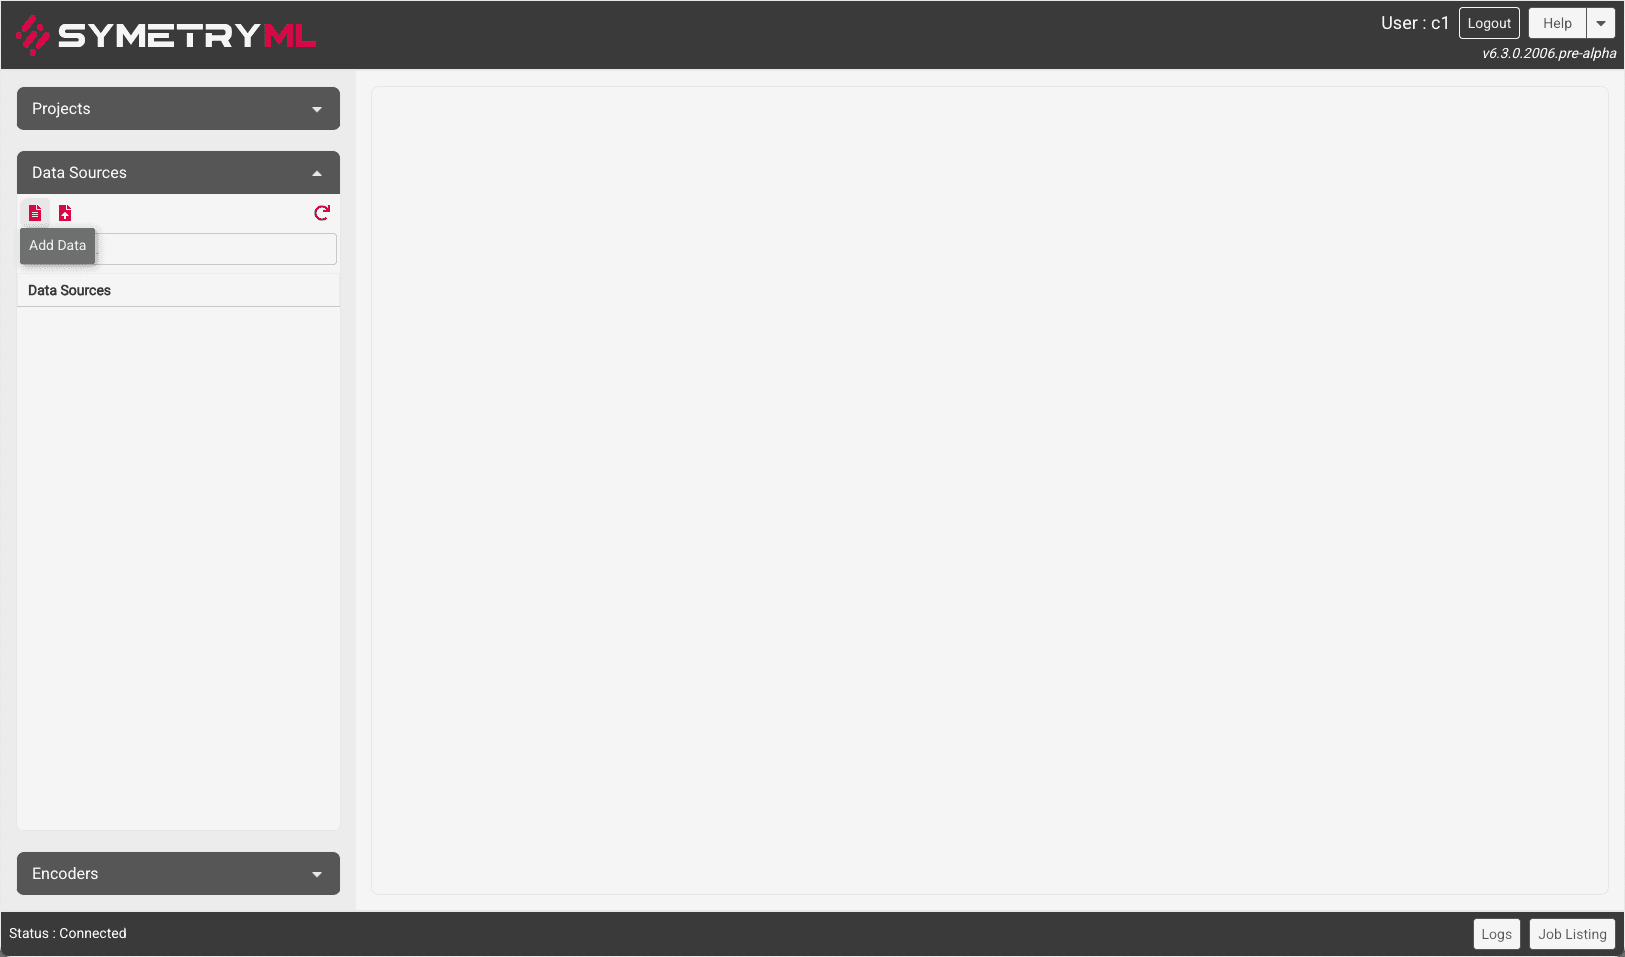
Select the preferred Data Source Type. The wizard forms change, depending on the type selected, as shown in the following figures
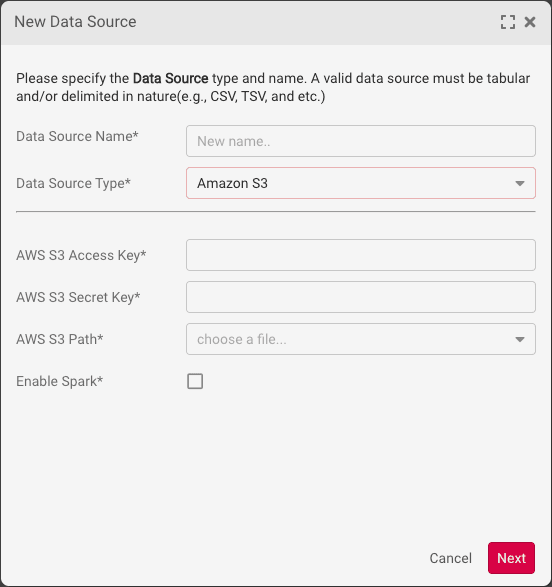
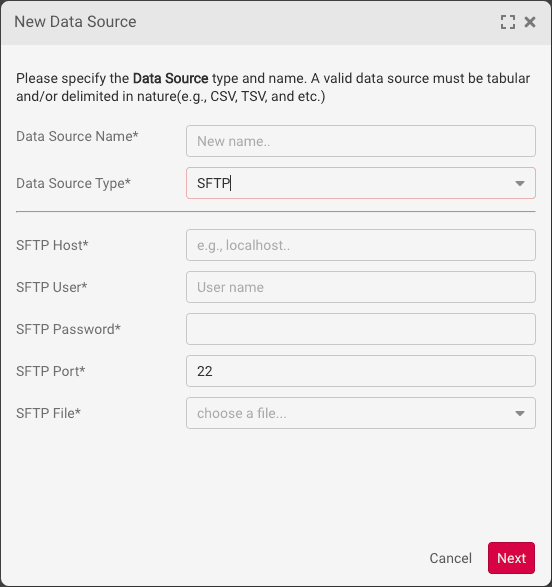
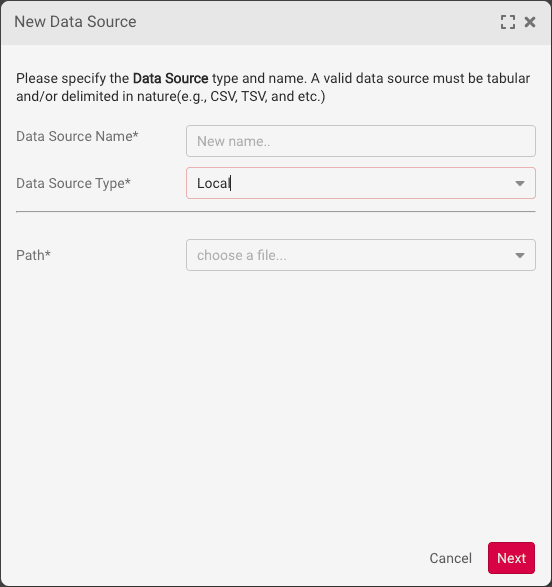
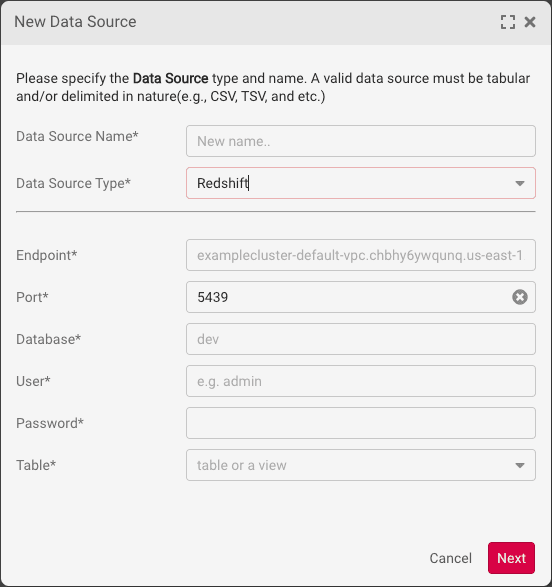
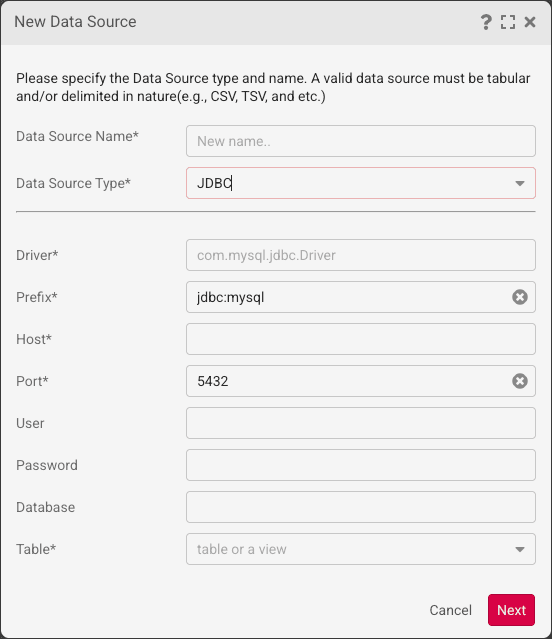
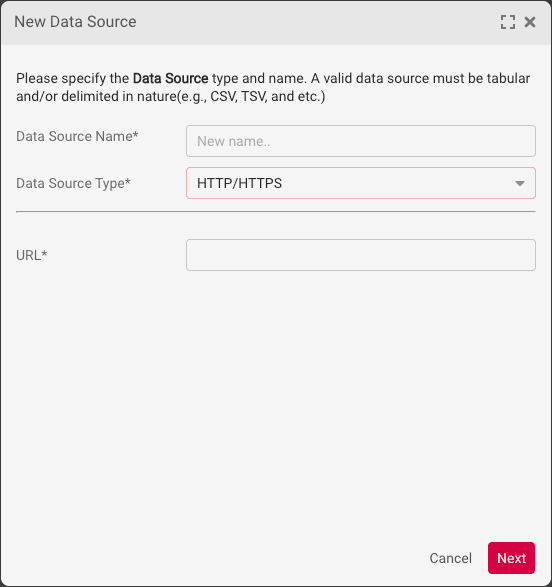
Ensure your data source settings are valid.
Click Finish to add the data source.
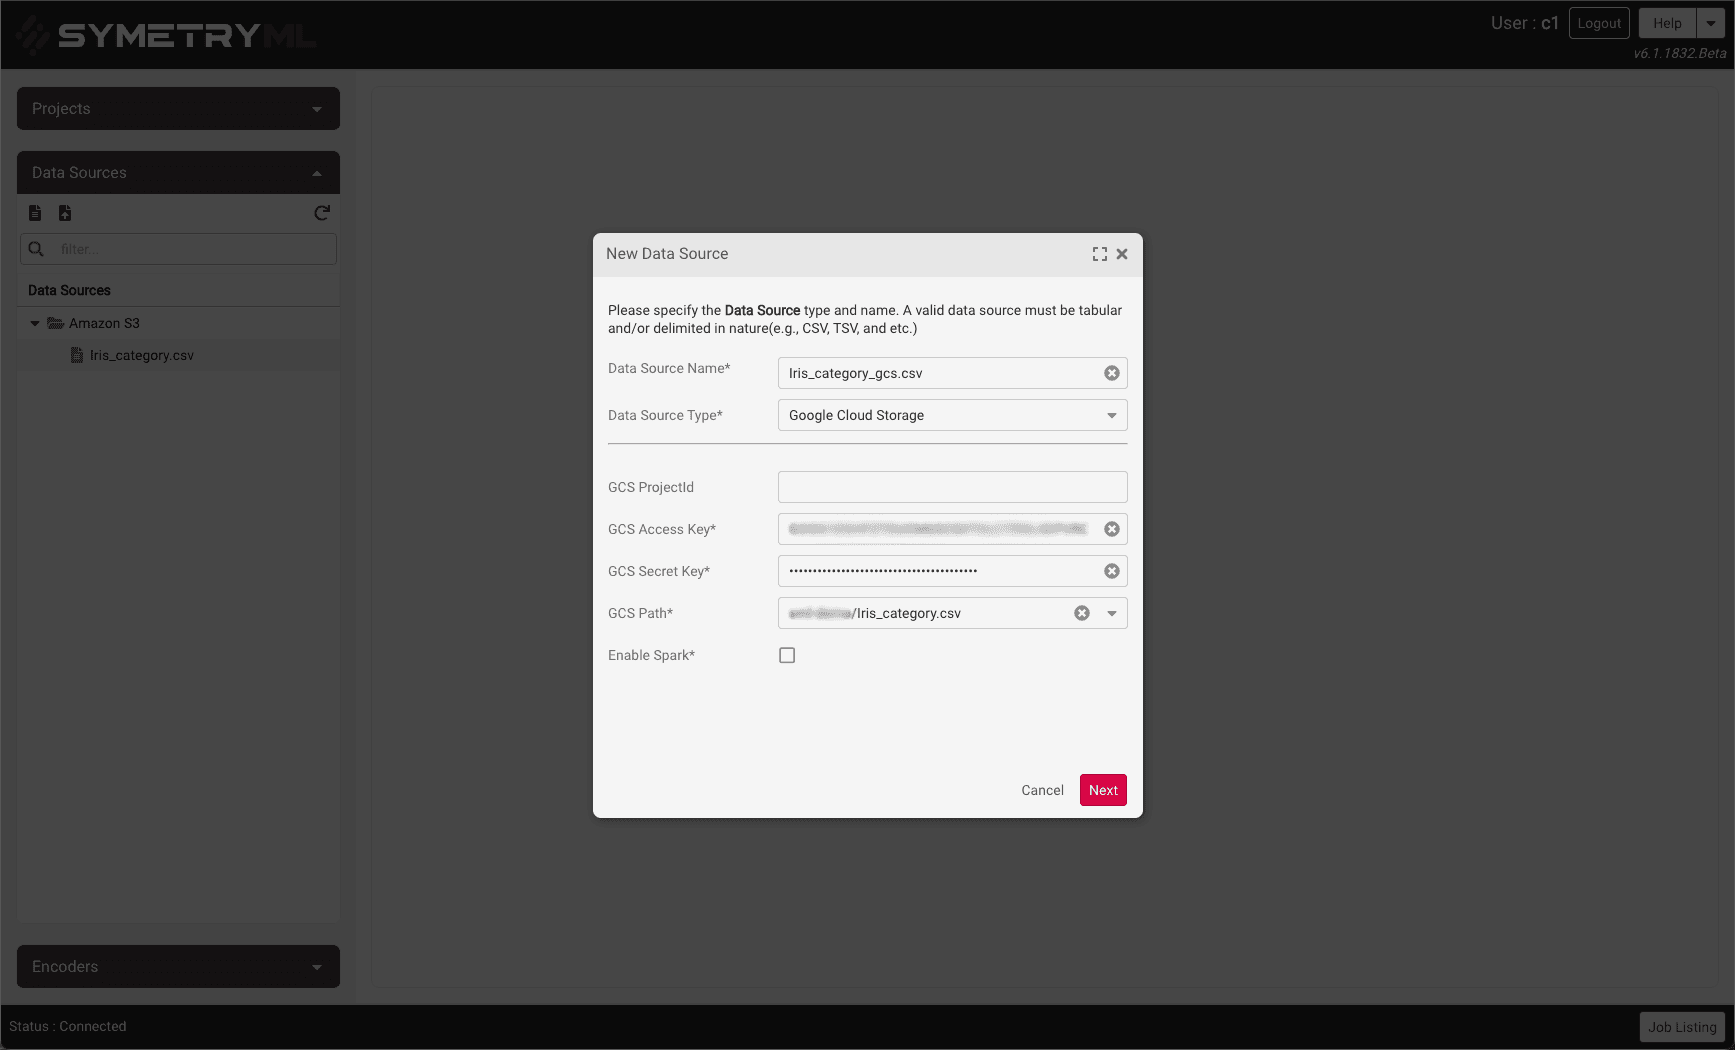
Google Cloud Storage (GCS)
For Data Source Type, select Google Cloud Storage. Enter the GCS Project name (optional), GCS Access Key, GCS Secret key, and then navigate to your data file you wish to create a data source with. For more information on Google Access and Secret keys please see the Cloud Storage HMAC guide.
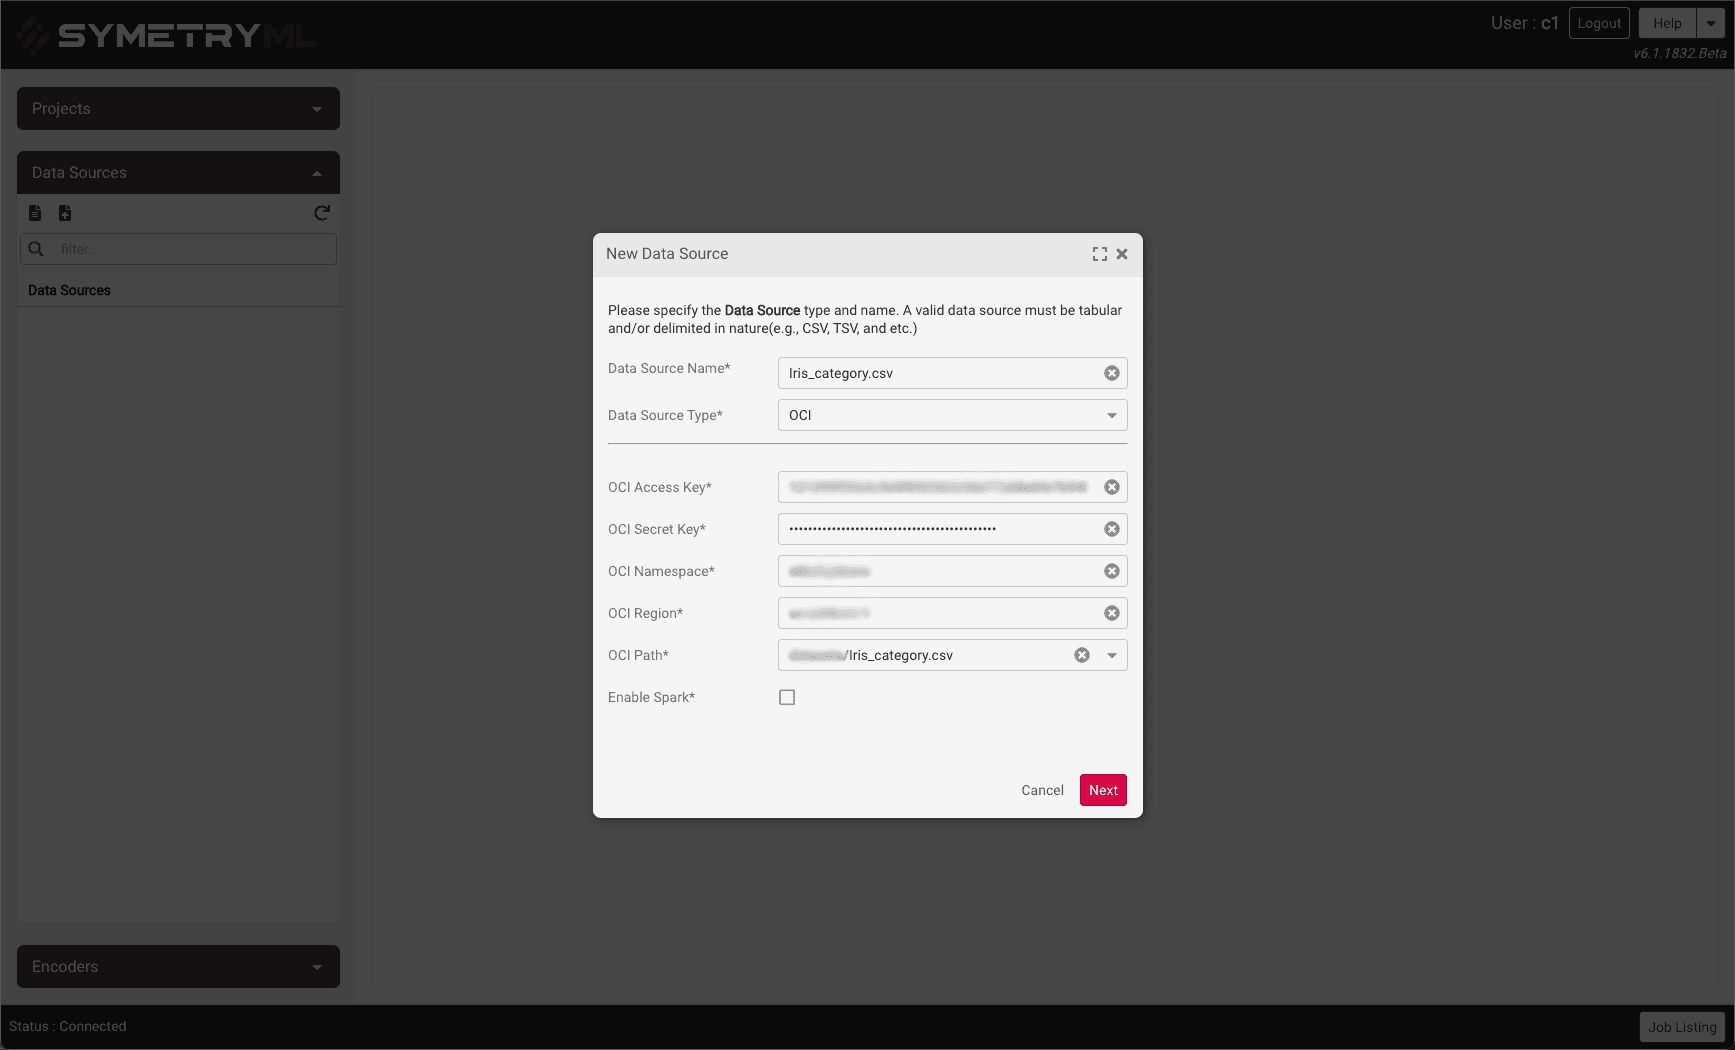
Oracle Cloud Infrastructure (OCI)
Please consult the Amazon S3 Compatibility API guide for details on how to configure your Oracle OCI Account for use with SymetryML.
For Data Source Type, select OCI. Enter OCI Access Key, OCI Secret key, OCI Namespace, OCI Region, and then navigate to your data file you wish to create a data source with.
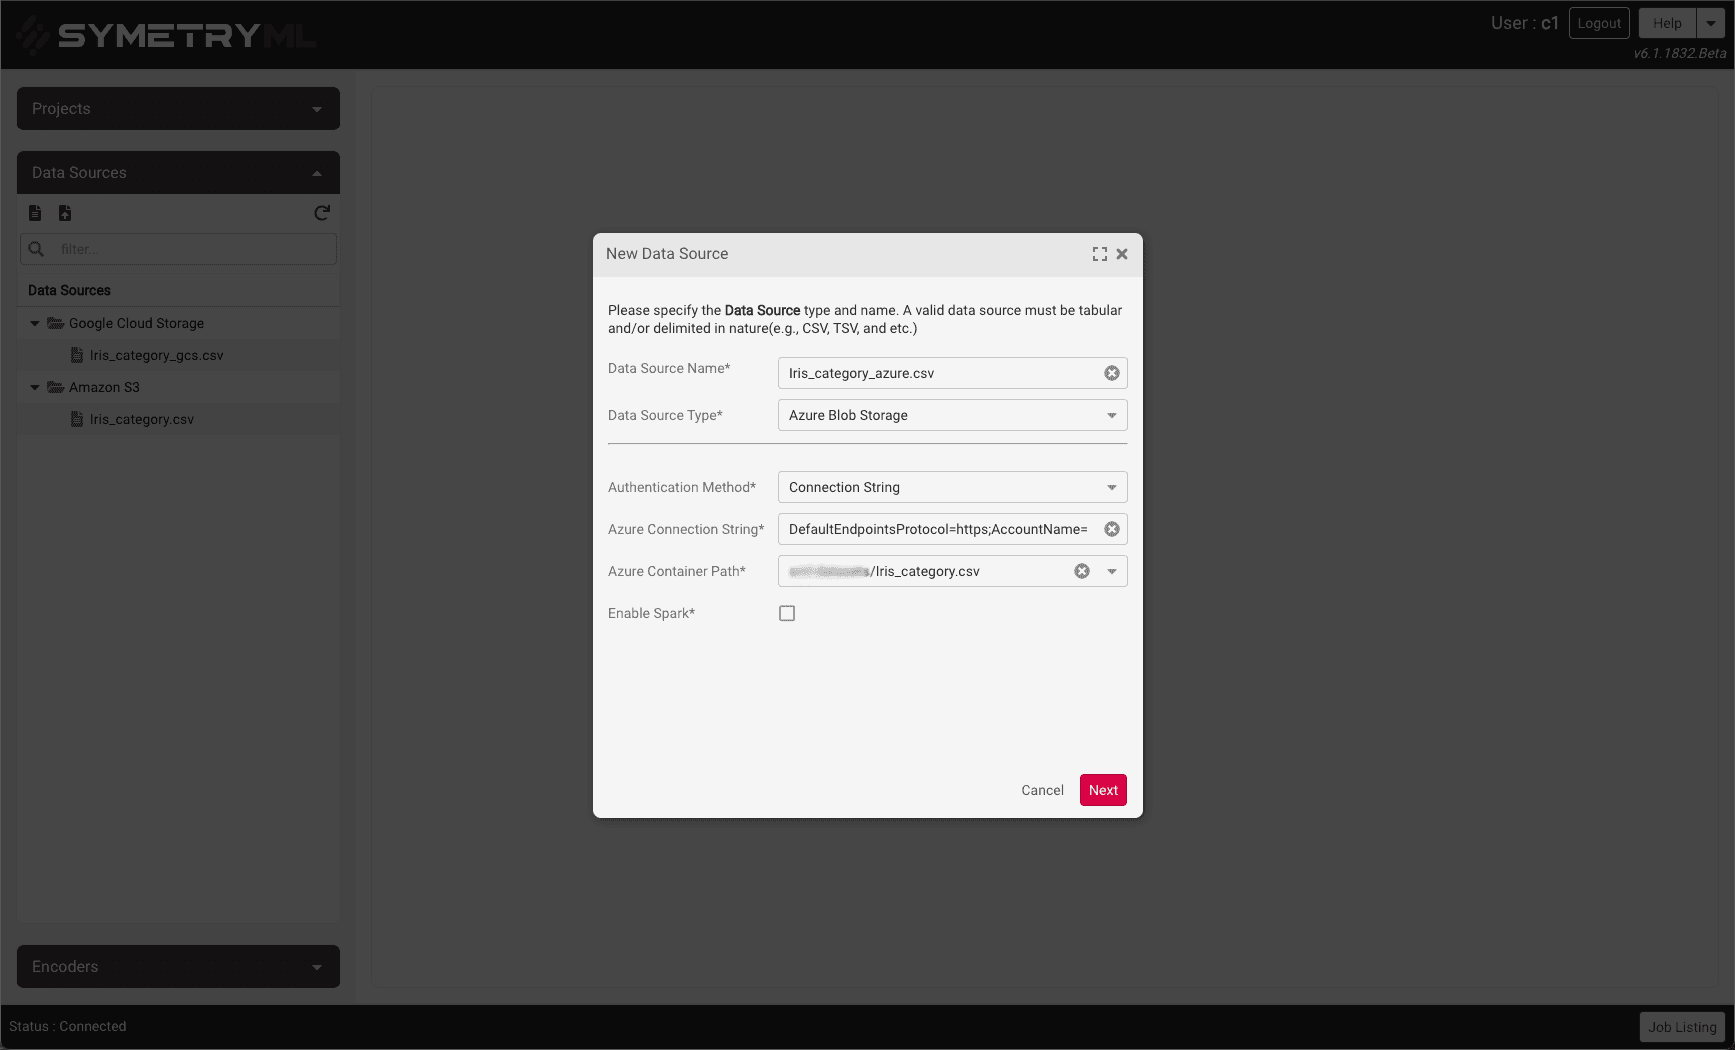
Azure Blob Storage (AZB)
For Data Source Type, select Azure Blob Storage.
Once selecting for Azure, choose your authentication method, SAS Token, Shared Token or Authentication String.
JDBC
For Data Source Type, select JDBC. Enter the JDBC Driver class (for example com.mysql.cj.jdbc.Driver), the Prefix (defaults to jdbc:mysql; use jdbc:postgresql for the PostgreSQL family), the Host, Port, User and Password. Database is optional — you can leave it blank and pick it while browsing.
Click into the Table field to browse for the data. If Database is empty, the browser first lists the available databases — pick one to open it. It then lists that database's tables and views — pick one to fill in Table with the full path. If Database was already filled in, browsing goes straight to that database's table listing.
Snowflake
For Data Source Type, select Snowflake. Enter Account (your Snowflake account identifier), User, and Private Key (the raw contents of the private key used to authorize the connection).
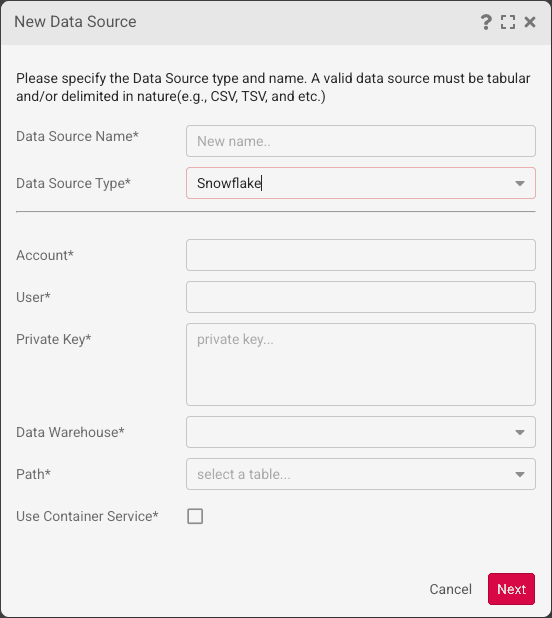
Click into Data Warehouse to browse and select from your available warehouses. Click into Path to browse for the data — the browser lists databases, then schemas, then tables; picking a table fills Path with the full DB/SCHEMA/TABLE. An account role, if your connection needs one, is selected the same way — via a browse lookup — rather than being typed in upfront.
Check Use Container Service to run the connection through Snowflake's Snowpark Container Services (CP3O) for distributed processing instead of reading through a warehouse; this reveals additional Container Service parameters (compute pool, worker count, and so on). For the full field reference for both modes, see Snowflake in the REST API documentation.
Spark Enabled Data Sources
Certain data sources are able to leverage Apache Spark for distributed learning and encoder creation. The list of data sources which are able to support Spark are:
- AWS S3
- Azure Blob Storage
- Oracle Object Storage
- Google Cloud Storage
To enable Spark for one of the supported data sources, select the Enable Spark checkbox and supply the master url.
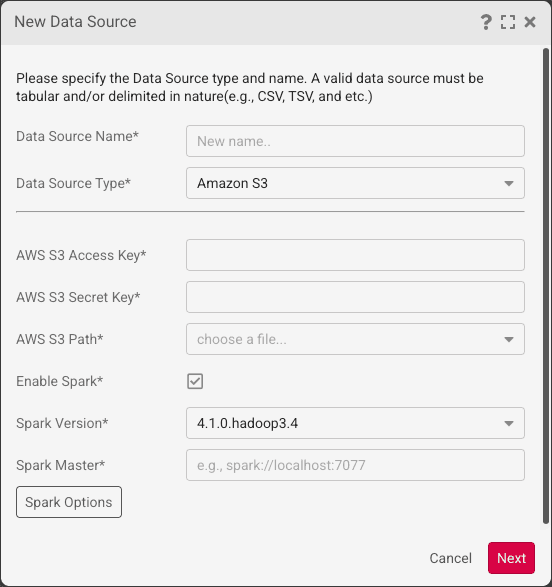
Additional Spark specific configurations can be supplied by clicking on the Spark Options button and supplying the corresponding key-value configuration pairs.
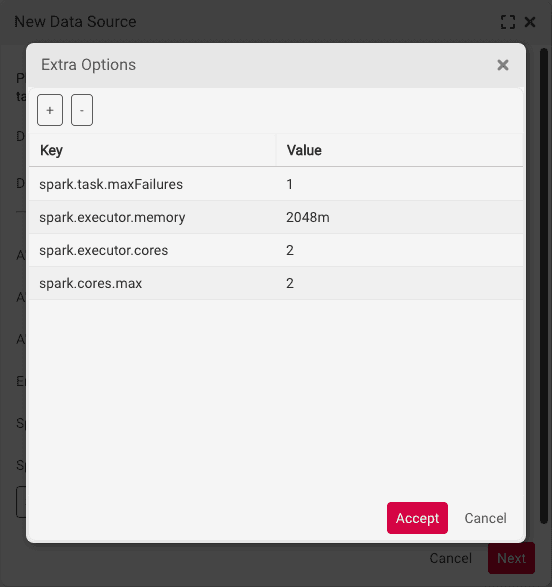
For a full list of Spark specific configuration parameters please see the official Spark documentation page
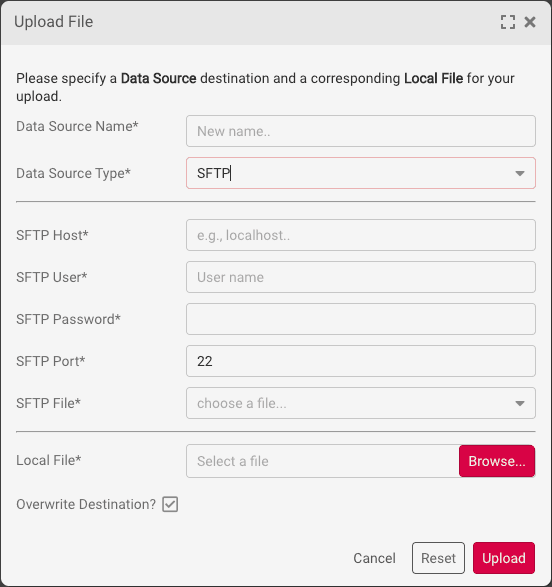
Uploading Data Source
Files local to the client’s machine can be uploaded onto a SFTP server via the Upload Wizard. This can be done by selecting a destination source and selecting a local file from the user’s computer.
Viewing Data Sources
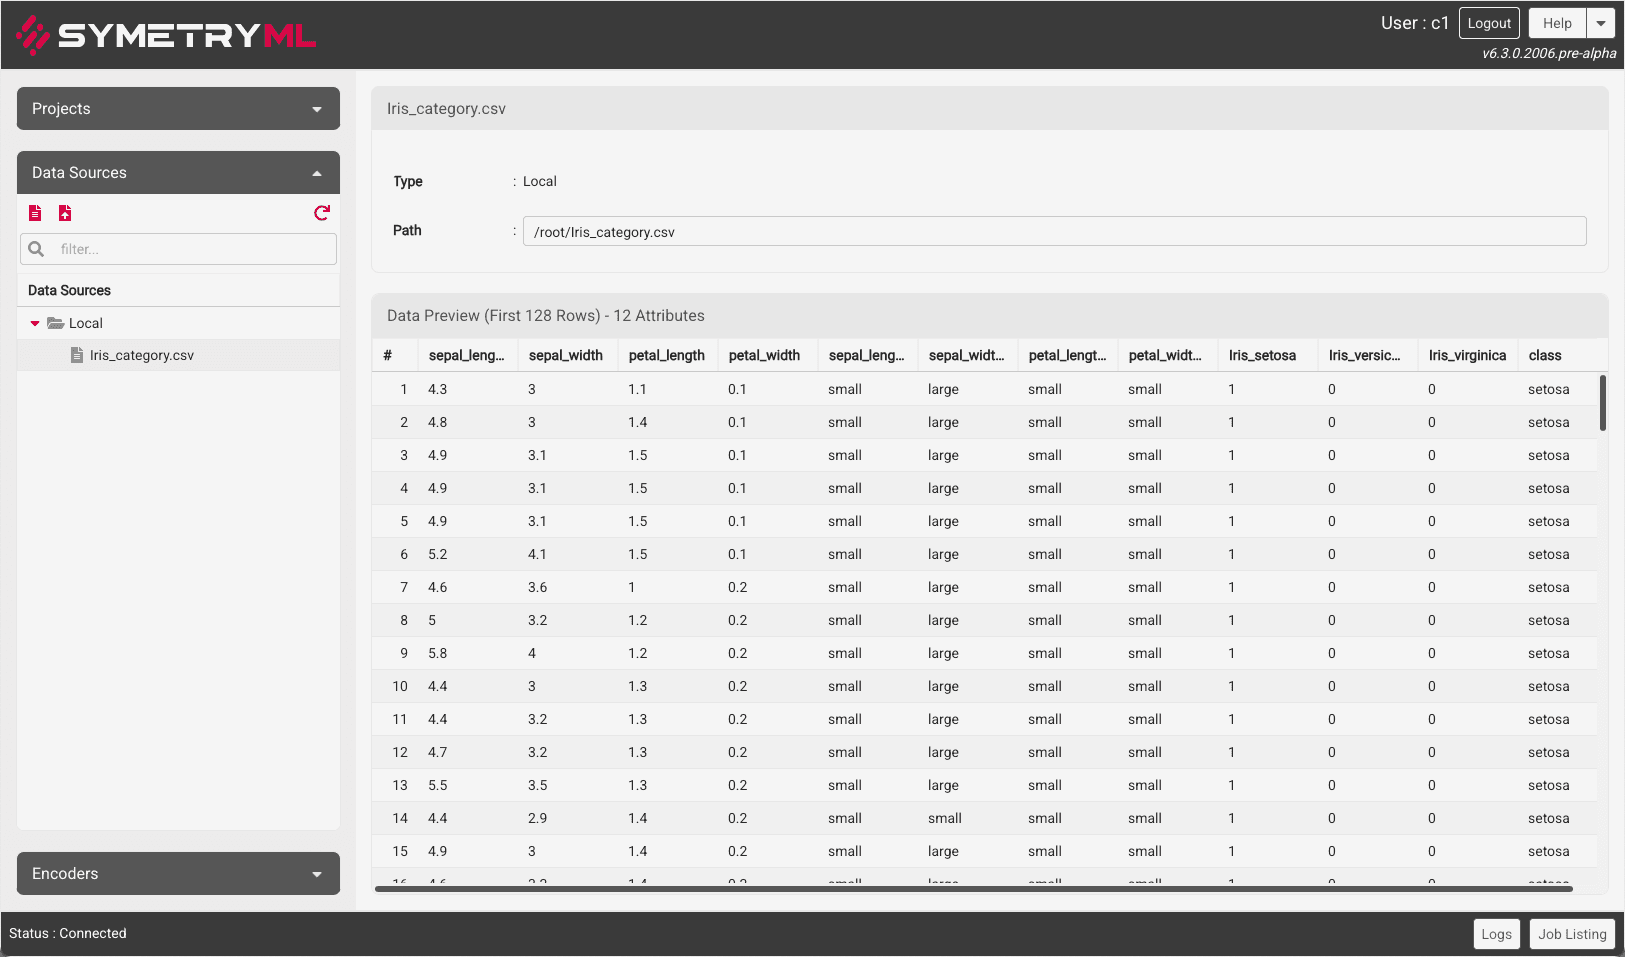
To view your newly created data source:
- Double-click the data source node under the Data Sources accordion.
- Inspect your newly added data.
Deleting Data Sources
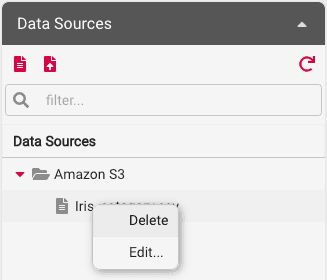
To delete a data source:
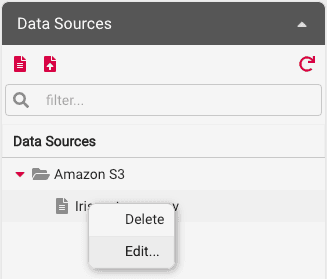
- Right-click the Data Source node, and then click Delete.
Editing Data Sources
To edit a data source:
- Right-click the Data Source node, and then click Edit.
- Update the fields as appropriate, and then click Next to continue.
- After validating your data source, click Finish to commit the changes.